Showing posts with label Veg Friendly. Show all posts

Wednesday, October 1, 2014

Mom's Banana Bread

I am the queen of buying bananas, with great plans of trying to eat healthier, and five days later we have fruit flies and my bananas are brown.  Oh well!  It gives me a great excuse to make my Mom's banana bread.  She's been making this bread for years and it was one of the first recipes I ever called her to get.

Mom's Banana Bread
1 1/2 cup mashed bananas (~3 bananas)
(I put them in my KitchenAid mixer so I don't have to do it by hand. Lazy, I know.)
1/2 cup melted butter
1 egg (beaten)
1 cup brown sugar
1 tsp vanilla
1 tsp baking soda
1 tsp baking powder
1 Tbs water
1 1/2 cups flour
1/2 tsp cinnamon

Optional: 1 cup of blueberries

Bake at 350 degrees on the middle rack for approximately 90 minutes.  I set the timer for 60 minutes and then use the knife test. Just pull them out when the knife comes out clean. Let cook and wrap in foil to keep the bread moist.

There aren't any photos because every time I though of taking one I decided to eat the bread instead.  Shoot.

So I will leave you with this... Any guesses where this photo was taken?


Wednesday, October 16, 2013

Mom's Tomatoes Provencol


Ok. So just when I think I’ve tried ALL of my Mom’s most amazing foods she does some sort of magic trick and pulls out a recipe that she tells me she’s had for years!!  Where in the world have I been? My life of preparing side dishes has now been changed forever.

I am absolutely not exaggerating when I tell you that this is one of the most amazing side dishes I have ever tasted.  It is a perfect combination of fresh tomatoes, herbs, and garlic!

This is, hands down, going to turn in to one of my favorite, go-to side dishes when we have guests.  It is so fresh and so flavorful yet warm and satisfying at the same time.  It’s also the perfect side dish when you want to add an item but you don’t want something super heavy.  We paired these tomatoes with salmon.

My mouth is watering just thinking about it!  Try it… you won’t be disappointed!


Tomatoes Provencol
4 large ripe tomatoes (I used vine tomatoes)
4 garlic cloves, peeled and minced
1 tbs chopped fresh basil
1 tbs chopped fresh parsley
6 tbs dry bread crumbs
3 tbs olive oil, plus extra for drizzling
½ tsp salt
½ tsp fresh ground pepper

Mix all together in bowl to form a paste. 

Wash and dry tomatoes. Remove stems and cut tomatoes in half through the width.  Put cut sides up on baking dish.  

Spread paste over each tomato half and drizzle with olive oil.  I actually had quite a bit of left over paste.  I had enough for at least 3-4 more tomatoes!  Buy extra tomatoes :)  

Bake at 400 degrees for 30 minutes.

Serve hot.


Hope you love this as much as we did!  Until next time... when Mom whips out a new secret gem!

xoxo

Tuesday, October 8, 2013

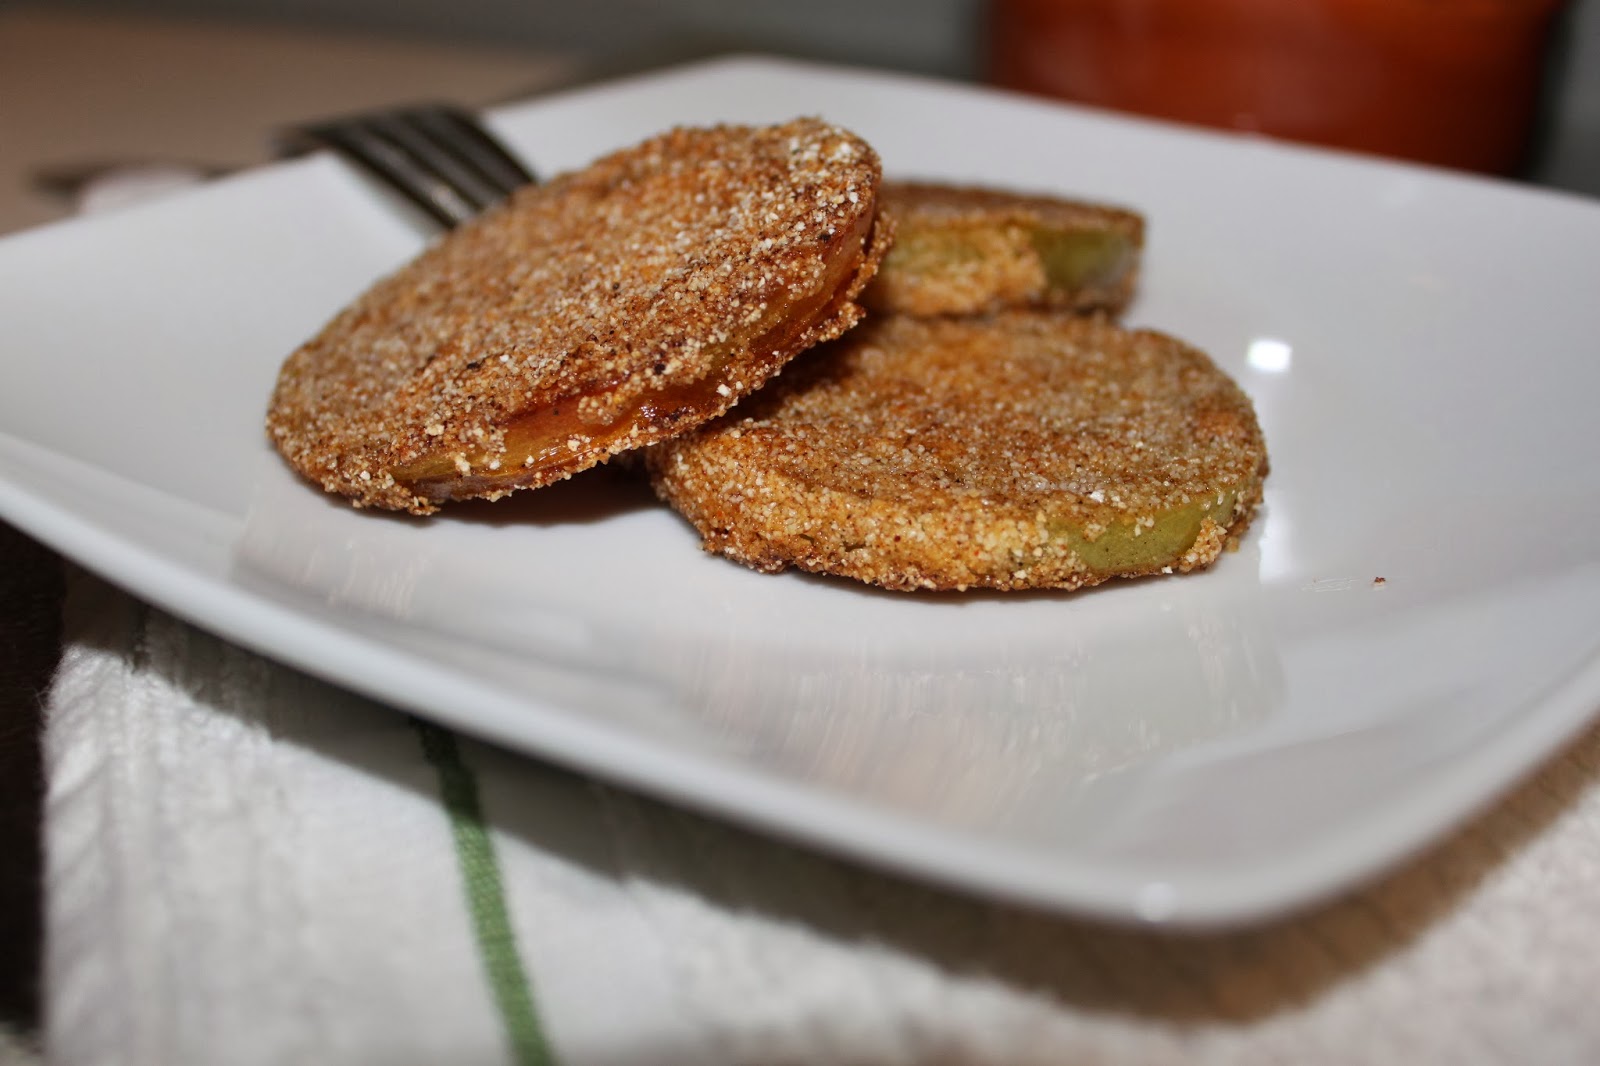
Farm To Table: (Not Your Grandma's) Fried Green Tomatoes


There are quite a few things that bring out the "southern girl" in me... one of which is fried food!  I'm pretty sure that my love for fried food started at birth and has never wavered.  Some of my all time favorites are fried hushpuppies, fried chicken strips, and cheese fries!  As I got a little bit older I quickly learned that not only did I love fried foods but my hips and thighs loved them as well.  They loved them so much, in fact, that they gobbled up every bit of fried food I ate and held on to it for dear life.

It was at this point that I learned that I had to alternate my fried foods with fresh fruits and veggies and that in the end it would all balance out.  The older I get the balancing act seems to require more fruits and veggies as less greasy goodness but that's neither here nor there!

One of my VERY favorite things is a deliciously fresh fried green tomato.  It takes me straight to my happy place... THE SOUTH!!

One of my best girlfriends, Amy, sent Brian a list of questions around the time of the wedding. The goal was to ask Brian the questions, get his responses, then ask me the same questions and see how many of our answers matched.  One of my favorite questions was, "Who is the better cook?".  I think a lot of my girlfriends were surprised because my answer (and Brian's answer) was without any hesitation, BRIAN!!  He has the creative mind to know what flavors mix well and has the ability to just create a recipe and have it turn out to be wonderful.  So for this recipe the credit goes 100% to my hubs.

I impulsively purchased some green tomatoes at the farmers market.  I had a moment of complete panic at the farmers market when I realized that the season is ending! I sliced my tomatoes, whipped out the milk and flour, and started to get prepared to cook.

All of a sudden I look around and my milk is gone.  Missing. No where to be found.  In it's place is an ice cold beer.  Want to batter something in beer? Twist my arm :)  Then my I turn back around and my flour has a box of corn meal sitting next to it and B is rummaging through the spice cabinet.  I've learned over the years that when B gets inspired in the kitchen it's best to just let him go because his results are almost always out of this world.  This recipe is so easy and I promise it will change your life!!

(Not Your Grandma's)  Fried Green Tomatoes
3 Large Green Tomatoes
1 Can Beer
1/2 C Flour
1/2 C Corn Meal
1 Tbs Spanish Paprika (any paprika will work)
1/2 Tbs Garlic Salt
1 tsp Black Pepper

Preheat cast iron skillet on the stove so that it's hot and ready to go.  Fill bottom with a thin layer of oil.   We used peanut oil but any will work.

Cut tomatoes into 1/4 inch slices. Have two bowls ready. Fill one with beer and the other with a mixture of dry ingredients.  Dip tomato slice in beer then put face down into dry mix and flip coating both sides equally.  


Once skillet is hot and oil is "glistening" as Brian says add your tomatoes in groups of three.  Brown on each side and you're ready to eat!


Friday, October 4, 2013

Farm To Table: Mom's Freezer Corn


So I guess in all honesty this blog post should be called Farm (er's Market) To Table!  Living in Danville we can't have an actual garden, however, we've been taking full advantage of all of the local farmers markets.  My dream is to one day have a HUGE garden!  When Brian asks me what I want to grow my response is usually "EVERYTHING!".  Brian took me to the fair two weeks ago and at that moment I decided that I also needed to add a few chickens to my future farm.  Brian quickly gave me the talk that I've heard from my Dad so many times over the course of my life. The talk that sounds something like this:

"Now, Taryn, you know that they are live animals and you have to take care of them.  You're going to have to feed them every day and then you're going to have to clean up after them.  Are you sure that you want to do that?  You can't just forget to water them like you do the plants "

Sound familiar?  Needless to say the chickens are still up for debate around our household.  The garden, however, is a done deal.  This year has actually been a great learning experience.  It would be really unfortunate to have a huge garden with great produce and have no clue what to do with it!  So this year I've been practicing with produce from the farmers markets.  

When I was younger I can always remember my Mom "putting up sweet corn".  We would make a run for a truck full of sweet corn one day and the next day I would come home from school with corn silks covering the kitchen, at least five cutting boards going at once, a minimum three women (sometimes Dad was recruited to shuck the corn) running around in aprons, and lots of boiling water.  At that phase of life I went on about my own business.  Then I moved out and realized that the sweet corn fairy doesn't just deliver the corn to the freezer every year.   

As I've gotten older there have been tons of things that my Mom used to make that I would KILL for.  Strawberry freezer jam, pies, bread pudding, chicken and noodles, meatloaf, cube steak... the list goes on and on.  I wish that I would have spent every spare second hanging out with her in the kitchen and made very attempt to absorb every single trick she has up her sleeve!  Now I try to absorb everything through long phone calls. One of my very favorite things that she would make was her freezer corn!  

If you're thinking about making it then JUST DO IT!  It's easy, it's a relatively quick process, and it's so worth it in the middle of a snow storm to pull out a bag of delicious home grown sweet corn.

I promise I wouldn't fib to you... this process is so easy and the product is OH SO DELICIOUS!

Mom's Freezer Corn
Fresh Sweet Corn (plan for 2 ears per person)
Ziplock Bags

Bring water to a full boil.

Shuck sweet corn and remove as many of the silks as you can.  Mine had a few friends (worms) living at the ends so I had to chop the ends off. Line your corn up in piles for servings (2 ears per adult and 1 ear per child)


Drop one serving of corn into the boiling water.


Blanch/boil in water for 5 minutes rotating the corn once throughout.

Remove from boiling water and drop into bowl of ice water to cool (This only takes about 30 seconds).


Cut off the cob and put in a ziplock freezer back removing all of the air.


Pop it in the freezer.


(My assembly line was a one man operating since Brian was at work.  I would put my corn in the boiling water and during the 5 minutes of blanching I would cut the previous batch off the cob and bag it.  You can cut it off the cob and bag it in less than the five minutes it takes to boil the next batch.)

When you're ready to eat your corn just remove from the freezer and pop the bag into a bowl, open the top, and put in in the microwave just long enough to soften.  Then remove from the bag and finish microwaving. At this point add butter, salt, and pepper to taste. 


Saturday, September 28, 2013

Mrs. B's Apple Butter


Fall is certainly one of my favorite seasons. What's not to love with the crisp cool air filled with amazing smells and the excitement of football!

Speaking of smells...  If want to fill your home with the sweet scent of apples and cinnamon without lighting fifty different candles, which I must say I am definitely guilty of having a candle lit in every room, I have just the way to do it! 

Crock pot apple butter is my new favorite hobby.  It requires about 10 minutes of chopping and peeling apples and then you're done.  The best part is that when your home smells delicious and mouth watering you actually get to eat it!

When working in the Emergency Department you run across all types of people and on a very special, rare day you run into one of those patients that just steals your heart.  Two days ago I had the pleasure of meeting the most sensational woman, who at 84 years of age is still climbing oak trees, cleaning her own gutters, and picking pears and apples from her own trees. She lives alone and has the sweetest soul and the most amazing stories.  She of course has no physician and has a medication list that is super easy to remember. NONE.  For privacy purposes, we will call her Mrs. B.

She is the perfect example of a woman who has worked hard every day, loved her family, and lived a full and rich life.  We talked about canning and cooking and somehow ended up talking about my desire to learn how to make apple butter.  We talked for quite some time about her family and her recipes and she walked me through her process of making apple butter!  What a treasured recipe that I will have forever in my mind.

 I brought her back yesterday for a recheck and as soon as I walked in the room I could smell them... APPLES!!  This amazing, sweet woman brought an entire bag of apples that she hand picked from her own apple tree.  This was one of those times in life that I thanked God for having the opportunity to work in a field that allows me to help people.  Little does Mrs. B know but she actually helped and taught me more than I could even begin to do for her.


You can tell the God lives deep within the woman's heart and it was such a blessing to cross paths with her.  It's crazy how you can come and go in and out of someones life so quickly and never really know how much you impacted them.   I'm sure she will never know it but she will be well known in our family... I packaged her butter in mini-jars to share! 

Mrs. B's Apple Butter

14 Apples
(I asked what kind of apples to use.  Her response,  "Whatever falls from the tree.")
Lemon Juice
2 Cups Apple Cider
Cinnamon
Cloves
Nutmeg

Peel, core, and chop apples. Toss around in just enough lemon juice to give a very light coating.  Mrs. B said that she used to make her apple butter in a roasting pan. She now uses the new crock pot her daughter bought her.  Toss the apples in the crock pot.  Coat the top with cinnamon.  I used a pretty hearty dose of cinnamon.  Add 1 tbs of cloves 1 tbs of nutmeg (more or less to taste).


Turn on low and just let it do it's magic.  I started my crock pot at 6pm.  We headed to bed around midnight so at that point I propped the lid open with my wooden spoon to let some of the moisture out. Turn your crock pot off and then back on before heading to bed. Most have timer cut offs and will automatically turn off after a certain number of hours.  We were up with the sun to head to work and our butter was done right at 6am.  

Remove the apples from the crock pot.  Put them in a food processor and process until smooth.


And there you have... Mrs. B's apple butter.


This would be amazing paired with John's homemade biscuits!
Today, due to time, we tossed it on some wheat bread.


Serve with a steaming cup of Onyx coffee in your favorite Saturday mug.

xoxo,
Taryn

Thursday, September 26, 2013

Kale Caesar Salad

I first heard the term "kale" on one of my best girlfriends blogs... Car was one of the bridesmaids in our wedding, is one of my best friends, and also happens to have an AMAZING food blog.  She inspires many of the meals around the Kendrick household.  I remembered seeing a recipe for kale sauté and thinking, "Sounds good... What's kale?".  If you're looking for some amazing, reputable recipes that are backed by an amazing wom then check out her blog.  You will not be disappointed!


After I read her recipe, the old Taryn instantly had no clue what kale was and moved on to something like a grilled chicken caesar on spinach.  Kale and I must have been meant to be soul mates because it popped up on another one of my favorite blogs last week!  Before I go further I'll just go ahead and admit it... I love watching The Bachelor and The Bachelorette.  There... I said it!

And so does my husband.  

I'm sure he's reading this saying "NO, I DO NOT!" However, there are the countless comments from his side of the living room that include but are not limited to:
"So who's the mean one this season?"
"Where's that one really good looking one?"
"Wait... What did she just say?"

Brian Kendrick... you are officially busted and I'm letting the cat out of the bag that you're a fan of The Bachelor.  He will continue to deny it I'm sure but luckily y'all are now in the know.

Jillian Harris is one of the former Bachelorettes and now has an amazing blog.  She is a designer for Love It Or List It (one of my favorite HGTV shows) and Extreme Home Makeover.  Fashion, food, and interior design... this girls got it all!  She also inspired my idea for Foodie Friday.

So getting to the point.  Foodie Friday this week included a caesar salad on kale.  Before I share this gem, I want to make it known that I did not take the photo of this salad nor did I create this recipe.  I'm a firm believer of giving credit where credit is due:


However, I have given it the old college try and it will rocked my world.  Promise yourself that you won't run for the hills when you read that there is anchovy paste in the dressing. I will be honest... it's in a tube that looks like it came out of a medicine cabinet, it's a really gross grey color, and it has the consistency of toothpaste. However, it's divine!  Trust me.


KALE CAESAR SALAD 

Serves 2-3

3 cups of fresh kale
1/4 cup - olive oil 
1 tbsp - white wine vinegar 
2 tsp - dijon mustard (I used stone ground because that's what we had on hand)
2 tsp - anchovy paste 
1/2 tsp - Worcestershire 
2 cloves garlic minced 
Salt & Pepper 
2 tbsp - grated parm 
2 tbsp - Miracle Whip
1 full lemon squeezed 
Fresh Baguette
Bacon


Easy as 1, 2, 3:

1. Make Your Dressing:  Mix together olive oil, vinegar, mustard, Worcestershire, garlic, and anchovy paste. Then add S&P, parmesan, and Miracle Whip.  Squeeze the juice of one full lemon into the dressing and whisk together. You can alter the amount of lemon and add extra vinegar at the end depending on your taste.
2. Throw your bacon onto a cookie sheet (lined with aluminum foil) and toss it in the oven at 375 degrees.  You will smell it when it's done.  Tear your baguette into bite sized pieces, toss them in some olive oil with salt and pepper, and toss them in the oven on broil for some easy homemade croutons.
3. Toss it all together, top it with more parm, garnish with a lemon slice, and pour yourself a glass of vino.  

Cheers to kale!

xoxo,
Taryn